Backyard tilapia farming
This guide is intended to teach home tilapia farming methods, including how to set up and cultivate a backyard tilapia pond. As you read, keep in mind that tilapia need five things to grow fast and healthy, including: clean water, oxygen, food, light, and room to swim. We have already written an extensive tilapia farming guide that covers these five needs on our main website at lakewaytilapia.com so we will avoid repeating them here. There are other articles on our main website that will help you understand the various grades of tilapia fingerlings as well as the genetic differences between the species. We urge you to use all of the resources that we have provided, and by all means contact us if you have any questions.
Aquaponics or traditional gardening
The purpose of this site, Backyard Tilapia, is to educate people who are interested in home tilapia farming. It's about the raising and harvesting tilapia not how to grow vegetables. That said, one of the responsibilities of any home tilapia farmer is the disposal of tilapia wastes and nitrate heavy water. Both aquaponics and traditional earth gardening offer solutions to these problems and each of these methods have their own merits.
Aquaponics works by recirculating the nitrate heavy water, after the solid wastes have been filtered out, through hydroponic grow beds filled with a growing media or floating rafts. The plants in the grow beds use the nitrates as fertilizer, slowing the build up of toxins and delaying the frequency of water changes. The main downside of aquaponics for many people, is the initial cost to set up a system large enough to support the number of tilapia that they want to raise. Arguably one of the biggest benefits of aquaponics, from the tilapia farming perspective, is that there is less waste water to dispose of. The bottom line is... If the space is tight, and water conservation is a concern, aquaponics offers a great way to turn the ammonia produced by tilapia into nitrogen for delicious fruits and vegetables.
Traditional earth gardens benefit from tilapia waste water when it is used it to directly irrigate crops. Fresh water can be continually added to the tilapia grow out ponds at a rate of about 3 percent of the total volume per day. The overflow passes into a holding tank, where it is stored for watering the garden. A small well pump inside the holding tank, connected to a pressure tank, will supply everything from a garden hose to an advanced irrigation system. Of course with smaller ponds you can just do traditional aquarium style water changes by using a siphon hose to remove 20 percent of your pond water each week for your garden, and then replacing it with fresh water. The main downside of direct irrigation has to do with the volume of water that must be disposed of. Your garden will have to be big enough to handle 100 gallons of water for every 500 gallons of pond volume each week. The biggest benefit of direct irrigation is the very low set up cost. The bottom line is... If you have the space for a large garden, and water is plentiful in your area, direct irrigation is probably the best waste water disposal method for you.
How to construct an inexpensive tilapia pond
A tilapia pond is nothing more than an above ground container filled with water. Examples for backyard tilapia farming use are kiddie pools, IBC totes, fiberglass hot tubs, and lined plywood troughs. Of course, for commercial aquaculture or aquaponics, there are more industrial pond options, but that's beyond the scope of home tilapia farming. Tilapia need one-half of a cubic foot of water, or 3.74 gallons, for every pound of their body weight. So, if you want to keep 144 pounds of fish in the same pond, you will need to have one that holds 72 cubic feet of water, or 538.56 gallons. A lined plywood trough that is 4 feet wide and 8 feet long, with 2.25 feet of water depth, is the exact size needed; and is what we will be using in our build examples for the rest of this section. Of course, you can expand this pond to any size that you want.
To figure out how many cubic feet, or gallons, you will need, simply decide on how many pounds of fish that you want to harvest every six to nine months, depending on species of tilapia fingerlings that you select, and then divide that weight in half to get the cubic feet. Then multiply the cubic feet by 7.48 to get gallons. For example: if you want to have 144 pounds of tilapia in your pond at harvest time, you take 144 and divide it by two to get 72 cubic feet (144 / 2 = 72). Then, to get the gallons, you just have to take the cubic feet, and multiply by 7.48 to get 538.56 gallons (72 x 7.48 = 538.56).
Once you know how many cubic feet or gallons you need, it's simply a matter of finding the right container to hold that much water; with a little lip at the top, so that your tilapia don't swim over the edge. To get the cubic feet of a rectangular pond, you multiply the length, times the width, times the water depth. To get the cubic feet of a circular pond, multiply the radius, times the radius (r squared), times 3.14 (pi), then multiply the result times the water depth.
Determine your tilapia pond construction
The simplest solution to making a tilapia pond, is to use a kiddie pool. A twelve foot diameter kiddie pool filled with 24 inches of water holds 1696.46 gallons and is very inexpensive. However, there are a couple of drawbacks to using one of these small pools as a pond. First, as the vinyl ages it tends to get very brittle, and it will eventually split down the side. You can support the sides after the pool is filled by surrounding it with thin plywood, or similar flexible material, but this will only buy you a second season of use. The best thing to do is replace the pool (or liner) every 24 months, or sooner. The second potential drawback to using a kiddie pool as a tilapia pond has to do with whether or not the fish are affected by the vinyl leaching chemicals into their water.
Some fish are extremely sensitive to the chemicals leeched into their water by vinyl, but tilapia are not on that list. So as far as your fish are concerned, a vinyl kiddie pool is as good as any other. But what about the fact that your tilapia are intended for human consumption? If you were farming tilapia at home to make extra money by selling the filets, you might think to yourself that there is no way that a kiddie pool will pass the food safety guidelines established by the FDA, which of course would be a good idea if you wanted to sell your processed tilapia to consumers. But this has nothing to do with low levels of toxins leaching into a pond from vinyl, it has to do with normal industry practices and the fact that the FDA only approves materials; they don't actually disapprove anything.
Whenever we see a big government agency, like the FDA, make a list of approved ingredients or materials, we seem to consider it our patriotic duty to automatically assume that everything else is disapproved, but this just isn't the case. The reason that the FDA has never approved the raising of tilapia in 45 gallon trash cans, is because it is not normal to do that. Since nobody wants to raise tilapia in a trash can, there's no reason for trash can manufacturers to seek FDA approval. The same goes for kiddie pool manufacturers. They aren't approved by the FDA, because they aren't intended for use as ponds. That doesn't mean that you can't use them as ponds, it just means that no laboratory has done a study on the effects of vinyl kiddie pools on fish intended for human consumption.
Don't forget the fact that you will probably be doing regular water changes, and that any vinyl toxins will never get the chance to build up in the first place. So as far as using a kiddie pool goes, the choice is yours. Incidentally, during the writing of the above two paragraphs, a bit of research was done in an attempt to find a single scientific article on the affects of food fish spending six to nine months exposed to the low levels of chemicals found in vinyl liners, and none were found. Like everything else, there's a lot of rhetorical questions, but no scientific evidence. More than a few of our customers use kiddie pools and their fish are healthy and delicious.
Now, after all of that talk about kiddie pools, we aren't even going to use one in our example. Instead, we are going to build a lined plywood trough.
A lined plywood trough has many advantages over other forms of ponds for home tilapia farming: It's nearly indestructible. It can be built to any size. It makes harvesting tilapia very easy. It's relatively inexpensive to build. And, just in case you want to expand into a small commercial tilapia farm, it can be easily made with readily available FDA approved materials. So in the next section, we will take you through the steps required to build a simple lined plywood tilapia pond.
Builder's Note: The pond in this example is designed to meet the minimum requirements for the home tilapia farmer. It is intended to be the lowest cost option, not the industry standard.
Gather your materials and tools
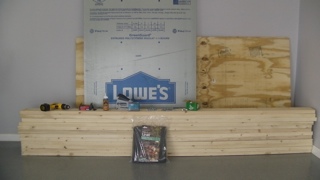
For our pond project we will need the following materials:
Important: Do not use pressure treated wood as it is poisonous to fish.
12 - 10' 2x6 boards
2 - 4x8 sheets of ½" plywood
1 - Sheet of styrofoam insulation board
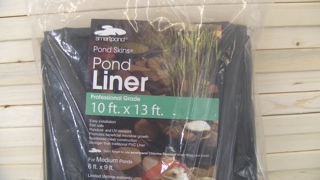
1 - 10' x 13' fish safe pond liner (available at Lowes for $69) or equivalent sized Dura Skrim R20WW pond liner, if you plan on processing your tilapia for sale. Dura Skrim R20WW is organically certifiable and rated as food safe.
Builder's Note: A white liner will make your tilapia easier to see in their pond.
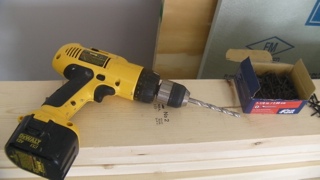
A drill with a bit large enough to make holes for the carriage bolts that you are using.
1 - One pound box of 1¼" deck screws.
I accidentally grabbed some drywall screws for the picture, but they weren't used.
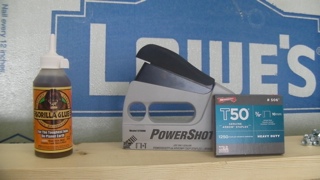
Some Gorilla Glue.
A staple gun.
Some 10mm staples.
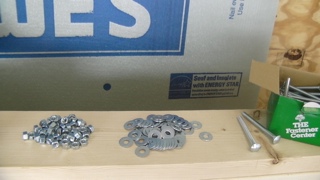
32 - 3½" carriage bolts with nuts and washers.
I used 3½ x 5/16
Not shown are:
A wrench to tighten the bolts.
A hammer to help line things up and tap in carriage bolts.
A few clamps.
A roll of duct tape.
Construct your tilapia pond
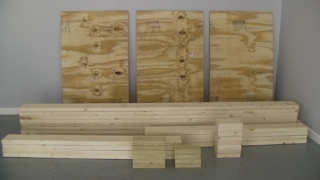
Cut the two sheets of plywood into three 30"x48" pieces each.
Cut four of the 2x6 boards into two 60" long pieces each.
Cut eight of the 2x6 boards down to 108" long each and cut the 12" scraps from each board down to 8" long each.
Also shown in this picture are:
4 - 8" long 2x4 pieces which will be used. (The six 12" 2x4s shown will not be used)
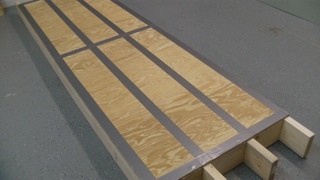
Construct two walls as pictured to the right and below using the following for each wall:
2 - 30"x48" pieces of plywood.
4 - 108" long 2x6 boards.
4 - 8" long 2x6 boards.
2 - 8" long 2x4s
Attach the plywood to the 2x6 frame with Gorilla Glue and deck screws. Cover the deck screw heads and plywood seam with duct tape to protect the liner from chafing and developing holes.
Make sure that the plywood is centered over the framing and that there is 6 inches of 2x6 protruding past the ends as shown.
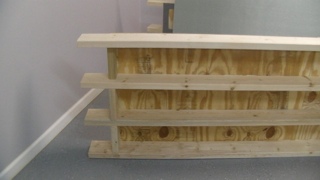
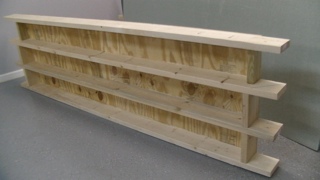
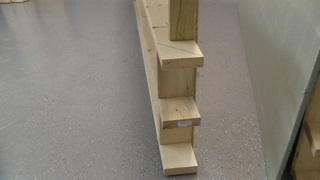
The eight inch verticals will prevent the plywood from bowing out at the corners over time. The 2x4s can be used at the top because there is less weight pushing outward.
At this point you can decide if you want to use water sealer on the side walls. Winter temperatures can create condensation which may cause some problems on unsealed wood. We use dehumidifiers to control condensation on indoor surfaces in the winter and open ventilation in the summer.
You may also choose to build a 5 foot by 9 foot platform out of 2x4's and some plywood to raise your pond off of your floor. Some concrete floors can get very cold and act as a heat sink in the winter even with insulation. The particular floor under this pond does not get very cold in the winter, so we will be placing the pond directly on the floor.
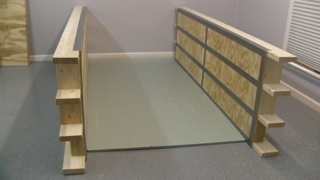
Select a location for your pond away from building walls so that you can pick up tilapia that jump out during pond maintenance and to facilitate easy servicing of the filtration. You should also paint any drywall surfaces with gloss latex paint designed for wet locations, such as bathrooms.
Lay the sheet of styrofoam insulation board on the floor where you want your pond and use it to square up your pond sides.
After you have your sides perpendicular to each other using the styrofoam sheet, you can clamp the sides together using the 60" long 2x6s and pull the styrofoam sheet out of the way. Draw a diagonal line as shown in the photo below to help keep your carriage bolts towards the middle of each 2x6 board. Be sure to make the corners of the 2x6 boards flush as shown to maintain the ½ inch space for the plywood and to keep the interior dimensions exactly 4'x8' after the plywood is installed. By the way, if the numbers seem off, they aren't. A 2x6 board is actually 1½ x 5½ so the interior dimensions will work out in the end.
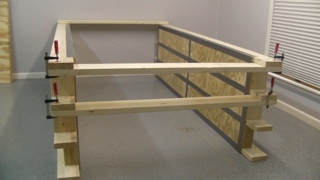
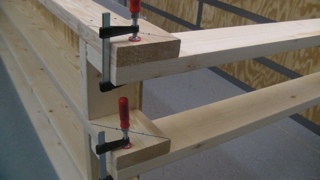
After you drill holes for the carriage bolts and use them to attach all the 60" long 2x6s this is what you should have. Note that the top board is attached underneath while the rest are on top. Also notice the ½" gap between the vertical pieces and the 60" horizontal ends.
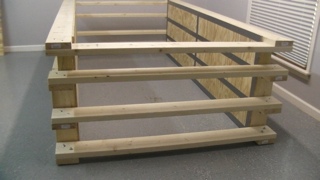
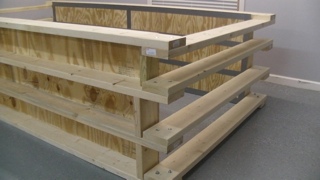
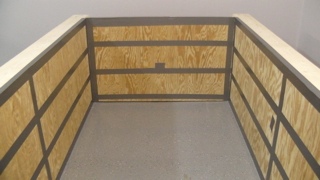
Attach a 48"x30" piece of ½" plywood to each of the ends using the deck screws and Gorilla Glue. Cover the screw heads with duct tape. Also cover any sharp imperfections in the wood such a knots and cover the top edges of the plywood with duct tape. Do not omit this step becasue sharp edges will eventually wear holes in your liner.
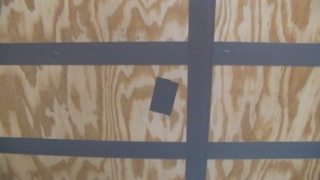
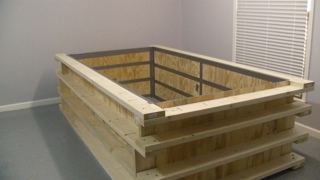
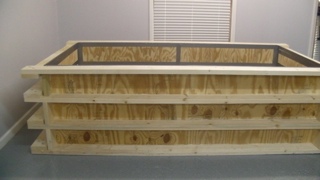
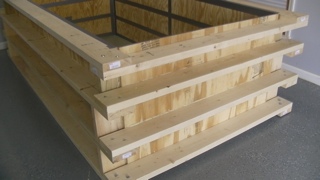
Lay the sheet of styrofoam insulation at the bottom of your pond. If you've cut everything to exact dimensions, it should fit perfectly.
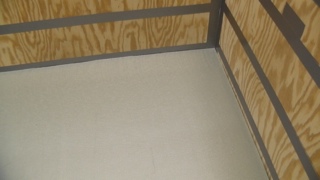
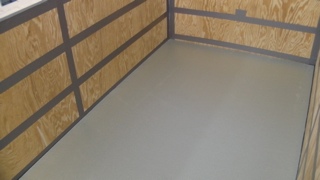
Loose fit the pond liner and hold it in place using staples. Be sure to only put staples along the top edge. The staples are only temporary and will be removed during filling.
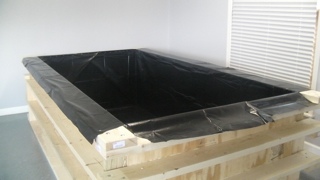
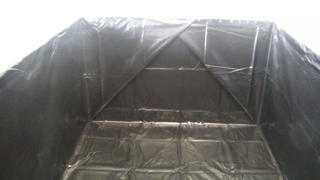
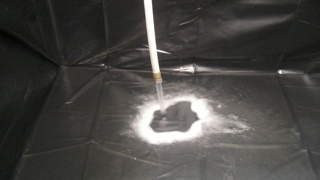
Now for the least fun part of it all - removing wrinkles.
Wrinkles in the pond liner will trap wastes on their way to the filter pump, chafe against nets, and cleaning brushes, eventually turning into leaks. They must be removed. There's really only one way to do it, and you're going to have to get wet.
First, put one inch of water in the bottom of your pond. This water will hold the liner down as you push out the wrinkles. Do not put more than one inch of water, or the wrinkles will crush down, and you won't be able to push them out.
Starting in the center and working your way outwards in a circular pattern, push the wrinkles towards the sides using your thumbs. You might be tempted to use your fingers to pick up and pull on the liner, but don't do it because you will create more wrinkles someplace else. Surrender to the fact that this is going to take a while, turn on the radio, and don't give up until every last wrinkle has been relocated to the sides of the pond.
After you have all the wrinkles moved to the sides, leave them alone, and put six inches of water in your pond. This amount of water weighs nearly one thousand pounds. Your pond liner isn't going anywhere.
Working on one side at a time, beginning with the long sides first, remove the temporary staples, and pull up on the liner just enough to remove the wrinkles that were pushed to the sides. Be sure not to pull up on the liner so hard that you pull it away from the corners, and form a curved edge with an air pocket underneath. If you do, you'll have to get back into the water and work the side of the liner back into the corner. Once you have made the sides and the folds in the liner as smooth as you can, permanently staple the liner to the outside edges of the 2x6's, on the sides only. On the ends you will only use as many staples as necessary to hold the fold. Later on, the staples on one or both of the ends will be removed to add support for filtration, so only staple the ends in a semi-permanent fashion.
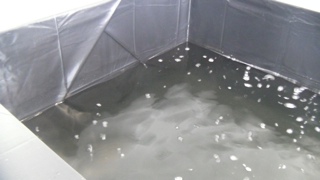
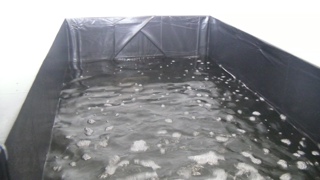
So there you have it, a simple and inexpensive tilapia pond ready for you to add the filtration and aeration method of your choice.
Tilapia Pond Filtration
There is an absolute biological fact that every tilapia farmer must accept:
Tilapia hydrate by osmosis.
This means that they get all of the water necessary for life by absorbing it through their skin. Tilapia do not drink water. In fact, no freshwater fish drinks water. This is probably the single most significant fact pertaining to tilapia pond filtration.
If you let your tilapia swim in their own poop, they will absorb it and they will taste like poop.
Filtration methods that allow poop to dissolve are disgusting and there are plenty of them out there. There is only one filter design that removes poop without your help and it costs thousands. Every other filter in existence requires you to manually remove the poop by some method. The questions are, how often do you have to remove the poop, how long does the poop removal process take and how much does it cost? This is where manufacturers take advantage of lazy people who only want to remove the poop once in a while. They make the filter so big that it never fills with poop. Instead these large filtration systems act like poop dissolvers turning once-removable poop into microscopic particles that easily enter your tilapia's body via the water they are absorbing through osmosis.
Regardless of your filtration type, you absolutely-positively must remove the poop every day if you intend to eat the fish later. Not doing so is like not flushing your toilet. Letting you fish steep in their own dissolved and rotting poop, no matter how cleverly hidden from view, will push their immune systems, cause diseases and render them inedible. So now that we know that the poop must be removed every day, the question is how long does it take? That totally depends on the filter. Some filters take 15 minutes to service, some take 30 seconds. Since you have to remove the poop about 100 times while they grow to harvest size, being able to remove the poop in 30 seconds is more appealing than 15 minutes.
The last question is, how much does it cost to replace the filter media? All filter media needs to be replaced eventually. Some are designed to last a long time and be rinsed out again and again, but they eventually wear out and are very expensive to replace. Other filter brands follow the lead of the computer printer business model by making their filters cheap, but make up for it with expensive filter cartridges. One brand, Aquaculture Filter, took the opposite approach, by using filter media that is so cheap you can simply throw it away.

The Home Tilapia Pro by Aquaculture Filter is by far the best solution for home tilapia farming. It takes about 30 seconds to change a filter that costs about 15 cents. No wet clothes, no hoses, no buckets, no towels, no nothing. Simply pull it up by its attached lanyard, open the weighted base, pull out the filter media and throw it away. Put in new media, replace the weighted base and use the lanyard to put it back in the pond. About 30 second of your time.
The unique flow of the Home Tilapia Pro actually pulls in fish poop using 500 gallons per hour of suction. The clean water outlet can be extended above the water line for added aeration. This truly is the best filter out there. Check out the Home tilapia Pro at Aquaculture Filter.
